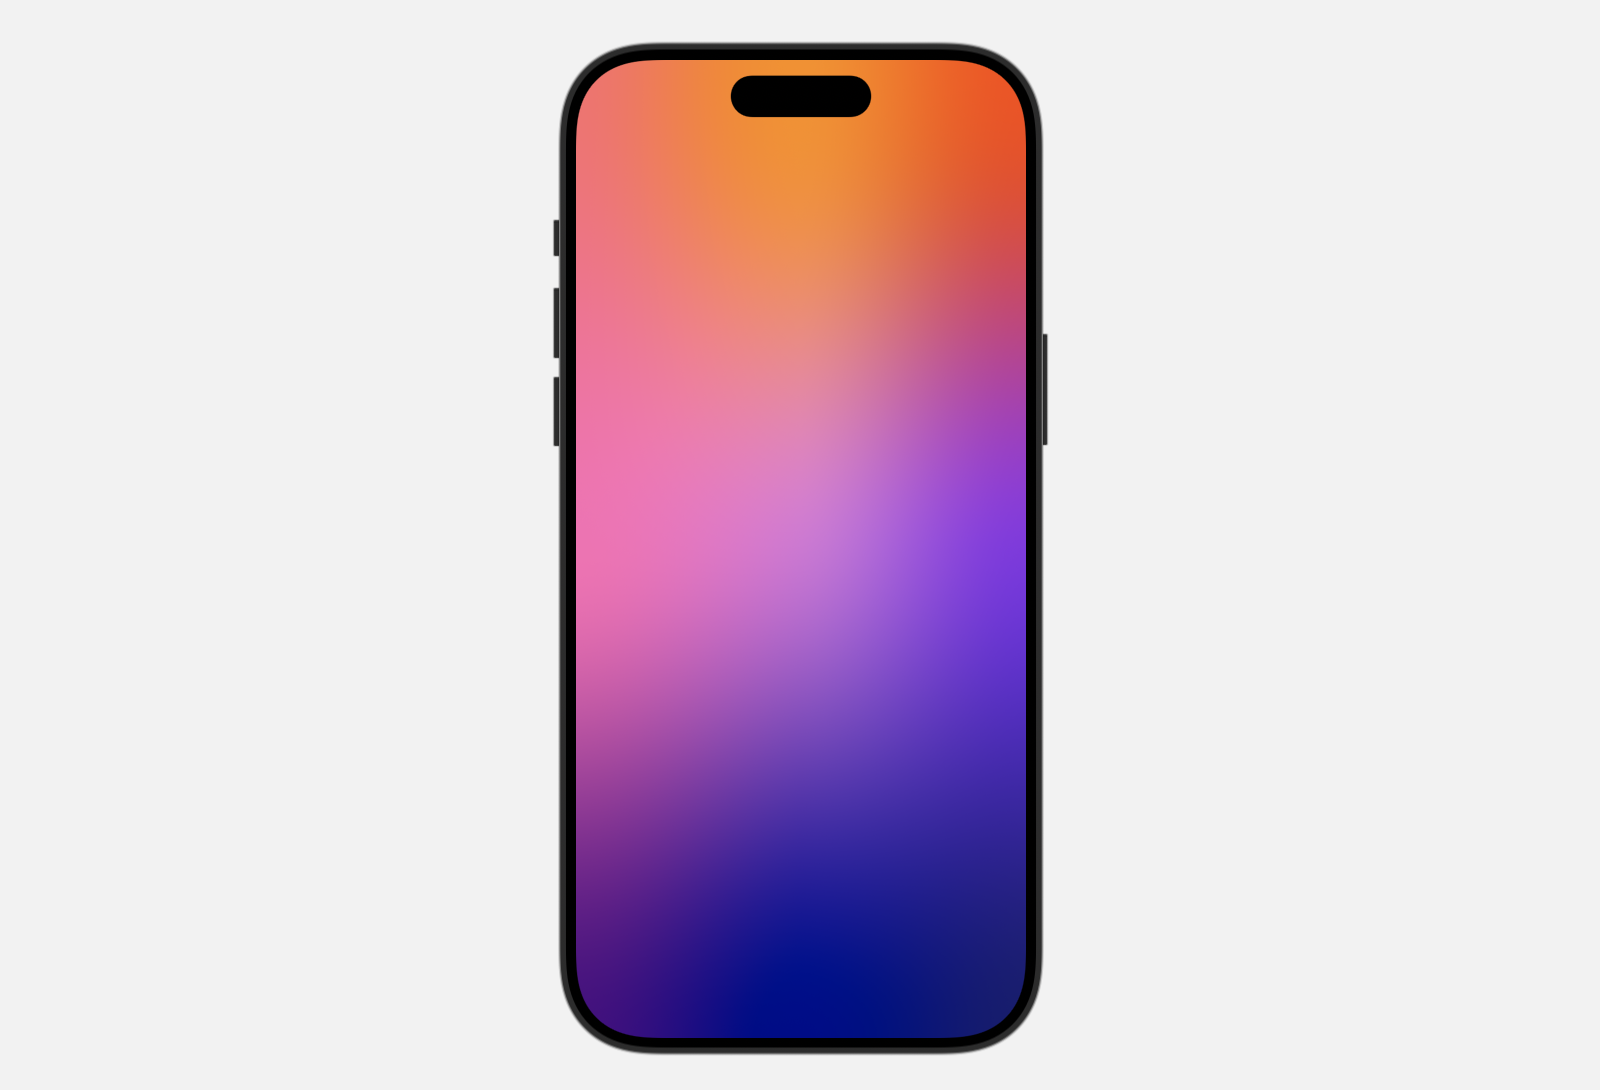
Animating Mesh Gradient with Colors
Welcome to a colorful journey through SwiftUI’s latest feature: MeshGradient. As part of iOS 18, MeshGradient offers developers an innovative way to incorporate stunning, intricate gradients into their applications, pushing the boundaries of user interface design.
Gradients have always been a cornerstone of visual design, providing depth, dimension, and a splash of color that can make any interface pop. With the introduction of MeshGradient, SwiftUI developers now have the capability to create complex, dynamic color schemes that are not only visually appealing but also highly customizable.
We start by defining the colors and points. Here is what that looks like:
private let colors: [Color] = [
  Color(red: 1.00, green: 0.42, blue: 0.42),
  Color(red: 1.00, green: 0.55, blue: 0.00),
  Color(red: 1.00, green: 0.27, blue: 0.00),

  Color(red: 1.00, green: 0.41, blue: 0.71),
  Color(red: 0.85, green: 0.44, blue: 0.84),
  Color(red: 0.54, green: 0.17, blue: 0.89),

  Color(red: 0.29, green: 0.00, blue: 0.51),
  Color(red: 0.00, green: 0.00, blue: 0.55),
  Color(red: 0.10, green: 0.10, blue: 0.44)
]

private let points: [SIMD2<Float>] = [
  SIMD2<Float>(0.0, 0.0), SIMD2<Float>(0.5, 0.0), SIMD2<Float>(1.0, 0.0),
  SIMD2<Float>(0.0, 0.5), SIMD2<Float>(0.5, 0.5), SIMD2<Float>(1.0, 0.5),
  SIMD2<Float>(0.0, 1.0), SIMD2<Float>(0.5, 1.0), SIMD2<Float>(1.0, 1.0)
]
SIMD stands for Single Instruction/Multiple Data. It is an efficient way to perform operations on multiple data points at once.
- SIMD2<Float> represents 2D coordinates (x, y) using floating-point numbers.
- The values range from 0.0 to 1.0, representing relative positions in the view.
- Using SIMD can lead to better performance, especially when doing calculations with these points.

struct MeshGradientView: View {
    var body: some View {
        MeshGradient(
            width: 3,
            height: 3,
            locations: .points(points),
            colors: .colors(colors),
            background: .black,
            smoothsColors: true
        )
        .ignoresSafeArea()
    }
}
Breaking down MeshGradient initializer parameter by parameter:
- width and height: These define the dimensions of the gradient mesh. In our example, I am using a 3x3 grid, so both width and height are 3.
- locations: This is an array of points where the colors will be placed.
- colors: This is an array of colors that correspond to each location in our mesh. The number of colors should match the number of locations (width x height).
- background: This is the color that fills any area outside the defined mesh.
- smoothsColors: This determines whether the color interpolation between points is smooth (cubic) or not. I like to set this to true for a more smooth look.
Mesh gradients can be animated beautifully just by varying the values you pass in. For example, if we use a TimelineView to redraw the gradient regularly, we can calling a method animatedColors(for:) and passing in the current date from the timeline. This is how we shift the hue of color over time:
private func animatedColors(for date: Date) -> [Color] {
  let phase = CGFloat(date.timeIntervalSince1970)

  return colors.enumerated().map { index, color in
    let hueShift = cos(phase + Double(index) * 0.3) * 0.1
    return shiftHue(of: color, by: hueShift)
  }
}
For each color, we calculate a hue shift using a cosine function. I like the cosine method over sine function. sin sounds like a sinner function. This creates a smooth, wave-like shift for the colors over time.
Finally, we shift the hue of the colors:
private func shiftHue(of color: Color, by amount: Double) -> Color {
  var hue: CGFloat = 0
  var saturation: CGFloat = 0
  var brightness: CGFloat = 0
  var alpha: CGFloat = 0

  UIColor(color).getHue(&hue, saturation: &saturation, brightness: &brightness, alpha: &alpha)

  hue += CGFloat(amount)
  hue = hue.truncatingRemainder(dividingBy: 1.0)

  if hue < 0 {
    hue += 1
  }

  return Color(hue: Double(hue), saturation: Double(saturation), brightness: Double(brightness), opacity: Double(alpha))
}
This function takes a color and a shift amount. It extracts the hue, saturation, brightness, and alpha values from the color by converting it into a UIColor first. Then it adjusts the hue by the given amount, making sure it stays within the valid range of 0 to 1. Finally, it creates a new Color with the shifted hue.
Here is the full code on animation MeshGradient:
struct AnimationMeshGradientView: View {
    private let colors: [Color] = [
        Color(red: 1.00, green: 0.42, blue: 0.42),
        Color(red: 1.00, green: 0.55, blue: 0.00),
        Color(red: 1.00, green: 0.27, blue: 0.00),

        Color(red: 1.00, green: 0.41, blue: 0.71),
        Color(red: 0.85, green: 0.44, blue: 0.84),
        Color(red: 0.54, green: 0.17, blue: 0.89),

        Color(red: 0.29, green: 0.00, blue: 0.51),
        Color(red: 0.00, green: 0.00, blue: 0.55),
        Color(red: 0.10, green: 0.10, blue: 0.44)
    ]

    private let points: [SIMD2<Float>] = [
        SIMD2<Float>(0.0, 0.0), SIMD2<Float>(0.5, 0.0), SIMD2<Float>(1.0, 0.0),
        SIMD2<Float>(0.0, 0.5), SIMD2<Float>(0.5, 0.5), SIMD2<Float>(1.0, 0.5),
        SIMD2<Float>(0.0, 1.0), SIMD2<Float>(0.5, 1.0), SIMD2<Float>(1.0, 1.0)
    ]

    var body: some View {
        TimelineView(.animation) { timeline in
            MeshGradient(
                width: 3,
                height: 3,
                locations: .points(points),
                colors: .colors(animatedColors(for: timeline.date)),
                background: .black,
                smoothsColors: true
            )
        }
        .ignoresSafeArea()
    }
}

extension AnimationMeshGradientView {
    private func animatedColors(for date: Date) -> [Color] {
        let phase = CGFloat(date.timeIntervalSince1970)

        return colors.enumerated().map { index, color in
            let hueShift = cos(phase + Double(index) * 0.3) * 0.1
            return shiftHue(of: color, by: hueShift)
        }
    }

    private func shiftHue(of color: Color, by amount: Double) -> Color {
        var hue: CGFloat = 0
        var saturation: CGFloat = 0
        var brightness: CGFloat = 0
        var alpha: CGFloat = 0

        UIColor(color).getHue(&hue, saturation: &saturation, brightness: &brightness, alpha: &alpha)

        hue += CGFloat(amount)
        hue = hue.truncatingRemainder(dividingBy: 1.0)

        if hue < 0 {
            hue += 1
        }

        return Color(hue: Double(hue), saturation: Double(saturation), brightness: Double(brightness), opacity: Double(alpha))
    }
}Animating MeshGradients in SwiftUI is a powerful way to create engaging and dynamic user interfaces. With just a few lines of code, you can add visually stunning backgrounds that react to user input or change over time.